
How To Install Metal Roofing Panels?
Installing metal roofing panels requires good preparation, accurate measurements, and proper installation techniques to ensure long-term performance. Metal roofs can be made from steel, aluminum, copper, tin, or zinc, and each material offers strong protection and energy efficiency. Understanding the correct process helps create a roof that resists weather damage, reduces maintenance needs, and adds a clean, modern look to the building. This guide explains how to get the roof surface ready, install underlayment, place and secure the panels, install flashing, and complete the finishing details. It includes guidance for standing seam panels, exposed fastener systems, PBR/R panels, corrugated panels, and Paradise panels. When installed the right way, a metal roofing system can last 40 to 50 years or more while staying durable, attractive, and reliable.
Essential Tools and Materials for Metal Roof Installation
Before beginning a metal roof installation, it is important to have all tools and materials ready to avoid delays and mistakes. Basic measuring and layout tools include a measuring tape and chalk line for accurate alignment. Installation tools such as a drill, screw gun, circular saw, jig saw, metal-cutting saw, metal snips, and a claw hammer are needed to cut panels and secure fasteners correctly. To keep the roof watertight, you will need roofing adhesives, repair patches, sealants, and butyl tape to seal seams and fasteners. Safety equipment is also essential and should include work gloves, steel-toed boots, safety goggles, a sturdy ladder, scaffolding, a safety harness, and proper fall protection gear. Required materials include metal roofing panels made from steel, aluminum, copper, tin, or zinc, along with underlayment such as synthetic sheets or felt paper. You will also need drip edge, flashing, ridge caps, closure strips, furring strips, and screws with rubber washers. Having everything prepared in advance helps ensure a smooth, safe, and efficient installation process.
Table of Contents
- How To Install Metal Roofing Panels?
- Essential Tools and Materials for Metal Roof Installation
- Preparing Your Roof: Surface, Measurements, and Layout Planning
- Choosing the Right Metal Panels and Fasteners for Your Roof
- Step-by-Step Guide to Installing Metal Roofing Panels
- Installing Flashing, Ridge Caps, and Ventilation for a Durable Roof
- Common Mistakes to Avoid During Metal Roof Installation
- DIY vs. Professional Installation: What You Need to Know
Preparing Your Roof: Surface, Measurements, and Layout Planning
Proper roof preparation is a key step in metal roof installation. Begin by removing any old roofing materials and inspecting the roof decking closely. Look for signs of rot, soft spots, or damage, and repair these areas before moving forward. Once repairs are done, clean the roof deck so it is free of dirt, nails, and debris. A smooth and solid surface helps the metal panels sit correctly and seal properly. Next, measure the full roof area and roof slope using a measuring tape to ensure accuracy. Use a chalk line to mark straight guidelines where the panels will be installed. Choose a clear starting point, which is usually along the bottom edge of the roof. Plan the layout for standing seam panels, PBR/R panels, corrugated panels, or exposed fastener panels so they align evenly. Careful planning and a level roof surface make installation easier, improve waterproofing, and help the metal roof last longer. Learn more at Roof Replacement Cost Estimate Brooklyn.
Choosing the Right Metal Panels and Fasteners for Your Roof
Selecting the correct metal panels plays a big role in the roof’s durability, appearance, and overall performance. Steel and aluminum panels are popular because they are strong, lightweight, and resistant to rust. Copper, tin, and zinc offer a more premium look and are known for their long lifespan and natural weather resistance. The panel style also matters, as standing seam panels provide a clean, modern finish, while exposed fastener systems, PBR/R panels, corrugated panels, and Paradise panels work well for classic, agricultural, or industrial designs. Fasteners are just as important as the panels themselves. Always use roofing screws with rubber washers to create a tight, weather-resistant seal. Screws should be spaced evenly and installed snugly without over-tightening to prevent panel damage. Furring strips or battens can be added to improve airflow and support proper panel alignment. Sealant or butyl tape should be applied at panel overlaps and joints to block moisture. Using the right combination of panels, fasteners, and sealing materials helps create a strong, low-maintenance metal roof that lasts for decades.
Step-by-Step Guide to Installing Metal Roofing Panels
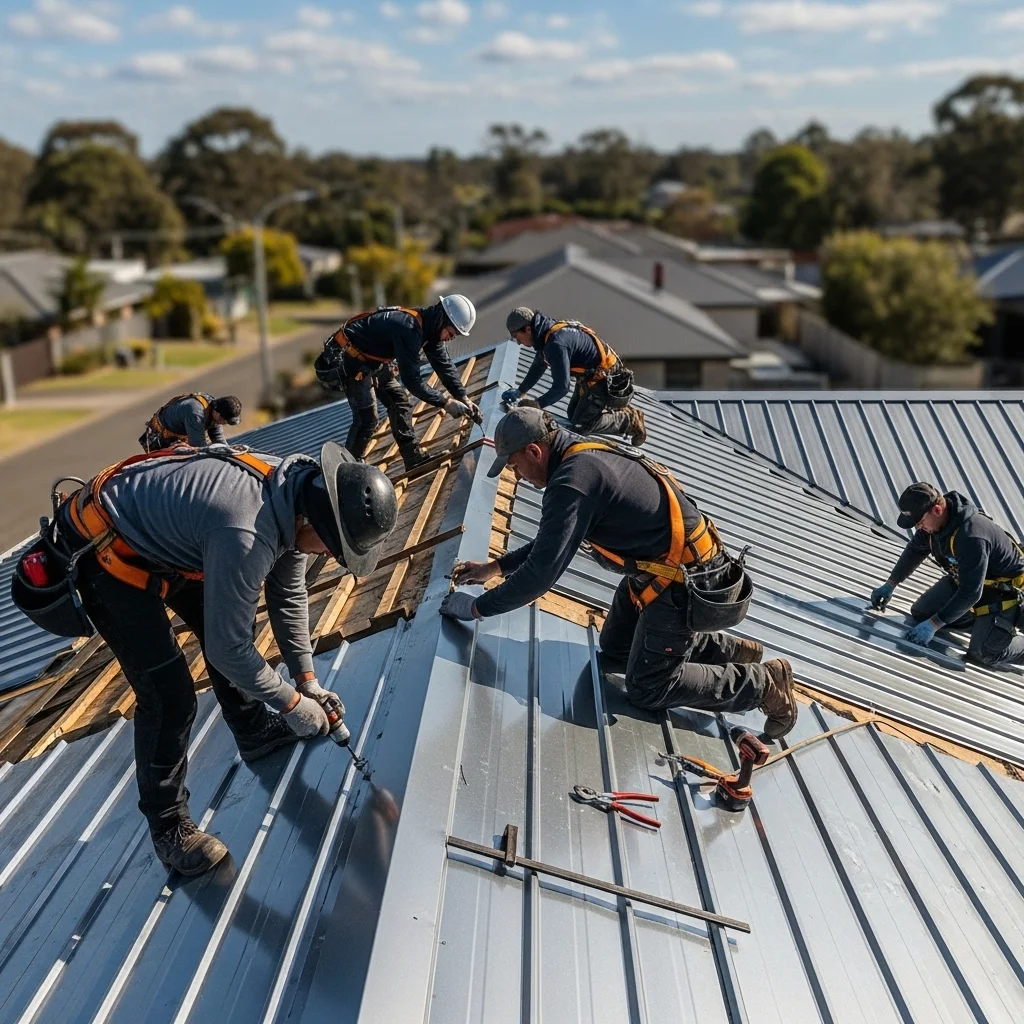
Begin the installation at the lower edge of the roof and continue working upward toward the ridge. Position the first panel so it overhangs the roof edge according to the manufacturer’s guidelines. Cut panels to the correct size using a metal-cutting saw or metal snips, and carefully align them with the chalk lines to keep rows straight and even. Proper alignment at the start helps prevent gaps and uneven panel placement later. Secure each panel using roofing screws with rubber washers, tightening them firmly but not too tight to avoid damaging the metal or washers. Follow the manufacturer’s instructions for panel overlap and apply sealant along the seams to stop water from entering. For standing seam systems, ensure the seams lock together fully for a tight fit. With exposed fastener panels, maintain consistent screw spacing across each panel. When installed correctly, metal roofing panels provide long-lasting protection, improve energy efficiency, and give the roof a clean, attractive finish.
Installing Flashing, Ridge Caps, and Ventilation for a Durable Roof
Once the metal panels are securely installed, the next step is adding the finishing components that protect the roof from water and moisture. Install a drip edge along the lower edge of the roof to guide rainwater away from the structure. Flashing should then be placed carefully around chimneys, vents, skylights, and any other roof openings to seal gaps and prevent leaks. Proper flashing installation is critical for keeping water from entering vulnerable areas. After flashing is in place, install the ridge cap along the peak of the roof and fasten it with screws according to manufacturer guidelines. Apply sealant, closure strips, and butyl tape beneath the ridge cap for added leak protection. Furring strips or battens can be used to improve airflow and reduce moisture buildup, helping prevent condensation under the metal panels. Correctly installing flashing, ridge caps, and ventilation systems helps create a waterproof, durable, and energy-efficient metal roof. Learn more at Durable Flat Roof Brooklyn.
Common Mistakes to Avoid During Metal Roof Installation
Avoiding common installation errors is important for keeping a metal roof strong and reliable. Do not place screws at an angle or space them unevenly, as this can cause leaks over time. Screws should never be driven too tight or left too loose, since both can damage the panels and washers. Skipping the underlayment, using overlaps that are too small, or cutting panels incorrectly can also reduce the roof’s ability to keep water out. Make sure the roof meets the minimum slope requirement of at least 3:12 to ensure proper drainage. Proper sealing is another key factor in long-term performance. All panel overlaps, roof vents, and ridge caps should be sealed carefully to block moisture. Before starting, inspect your tools and keep the work area clean and organized. Avoid working during unsafe weather conditions such as high winds or rain, and always use ladders, scaffolding, and personal safety gear the right way. By avoiding these mistakes, you help ensure the metal roof remains safe, durable, and long-lasting.
DIY vs. Professional Installation: What You Need to Know
Installing metal roofing panels on your own can help reduce labor costs, but it also comes with added risks. Metal roofing systems require precise measurements, correct fastening methods, and careful sealing to perform well over time. Experienced professionals understand local building codes and manufacturer guidelines, and they know how to properly install steel, aluminum, copper, tin, and zinc panels. They are also trained to handle flashing, ridge caps, and sealants in a way that prevents leaks and future damage. DIY installation can be a good option if you fully understand the process, have the proper tools, and follow all safety procedures. However, even small mistakes can lead to leaks, poor ventilation, or shortened roof life. Hiring a professional helps ensure the roof is installed correctly, remains energy-efficient, and has a clean, finished appearance. Professional installation also reduces the risk of costly repairs later. Learn more at Flat Roof Repair Brooklyn.