
How Metal Roofing Is Installed?
Installing a metal roof requires careful planning, the right materials, and precise execution to ensure long-lasting durability and performance. Metal roofing is used across residential, commercial, and agricultural buildings, and comes in a variety of types such as standing seam panels, corrugated sheets, ribbed panels, structural metal panels, stone-coated panels, metal shingles, and metal tiles. Each type has its own installation considerations. The process starts with assessing the roof surface, selecting the correct underlayment, and preparing essential accessories like fasteners, ridge caps, and flashing. Proper safety equipment, including harnesses, gloves, non-slip boots, ladders, and scaffolding, is essential to prevent accidents while ensuring the installation is professional and efficient.
Essential Materials and Tools for Metal Roof Installation
Successful metal roof installation begins with assembling high-quality materials and the appropriate tools. Required materials include roofing underlayment, purlins or furring strips for panel support, screws, nails, fasteners, ridge caps, flashing, drip edges, sealants, and insulation where needed. Essential tools include metal shears, circular saws with metal-cutting blades, drills, screwdriver bits, tape measures, chalk lines, ladders, scaffolding, and safety harnesses. The type of metal roofing you are installing whether screw-down, exposed fastener, or standing seam affects both the tools and the installation technique. Materials should be stored flat and dry to prevent warping or damage, and reviewing manufacturer instructions for coatings, thickness, and panel profile ensures that your roof will withstand local climate conditions.
Table of Contents
- How Metal Roofing Is Installed?
- Essential Materials and Tools for Metal Roof Installation
- Step-by-Step Process for Installing Metal Roofing Panels
- Tips for Proper Metal Roof Panel Overlaps and Fastening
- Installing Ridge Caps, Flashing, and Accessories Correctly
- Common Installation Mistakes and How to Avoid Them
- DIY vs. Professional Metal Roofing Installation: What You Need to Know
- Maintaining Your Metal Roof and Preventing Leaks
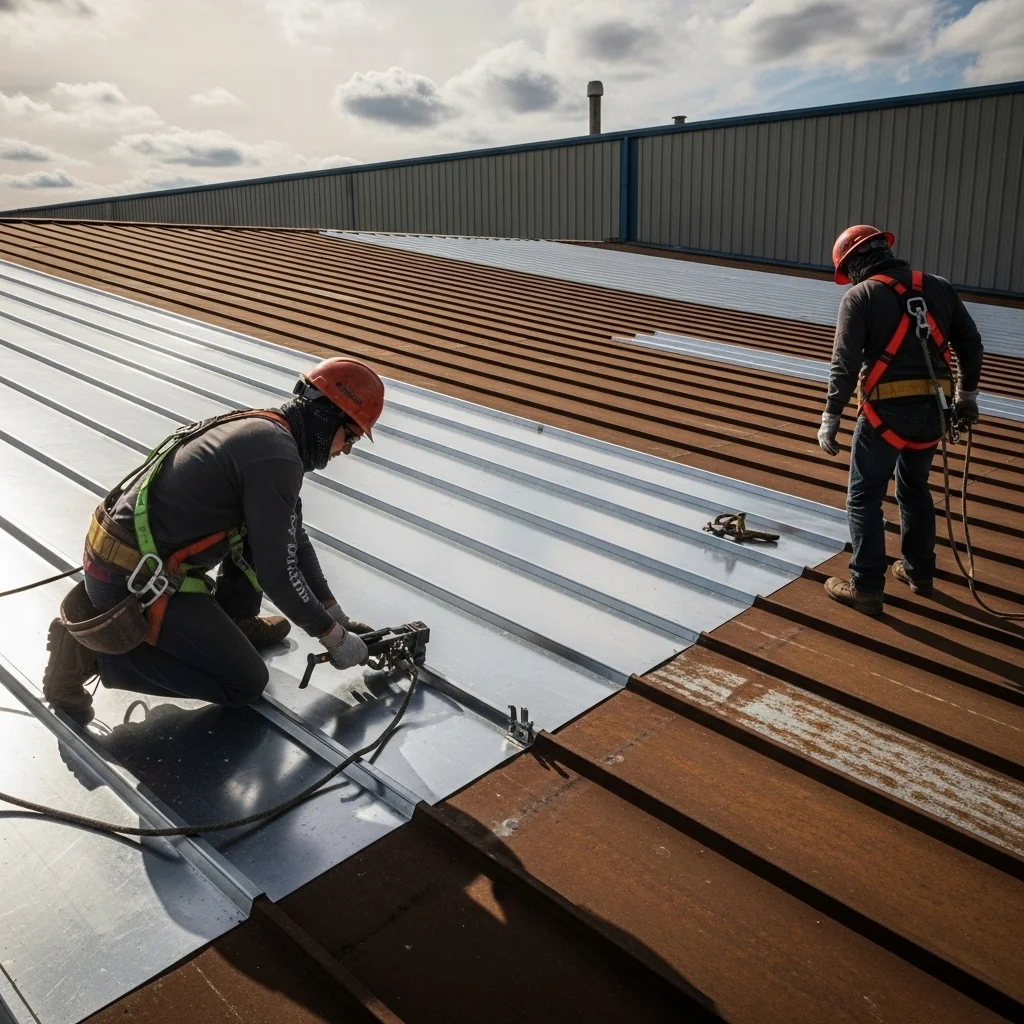
Step-by-Step Process for Installing Metal Roofing Panels
The installation process begins with preparing the roof surface by removing debris, inspecting for damage, and confirming proper slope and structure. Installing drip edges along eaves and rakes provides a secure base and prevents water infiltration. The roofing underlayment is applied next, overlapping each layer according to manufacturer specifications. Purlins or furring strips, if required, are installed to provide a stable framework for panel placement. Positioning the first metal roofing panel accurately is crucial for alignment and spacing. Subsequent panels are overlapped and fastened with care to maintain straight lines and structural integrity. Finally, ridge caps and flashing are installed, sealing roof penetrations such as vents and chimneys. A final inspection ensures that all panels are flat, overlaps are secure, and fasteners are tightened without over-compression, which could damage the panels.
Tips for Proper Metal Roof Panel Overlaps and Fastening
Correct overlap is critical for preventing leaks and accommodating thermal expansion. Side laps and end laps should be carefully aligned, and secondary sealants or foam closures can be used along ridges if required. Fasteners must be placed in appropriate areas, often in the ribbed sections or through clip systems, rather than flat valleys, and over-tightening should be avoided to prevent warping or oil canning. Consistent panel alignment, supported scaffolding, and inspection during installation help maintain a clean, professional look. Custom flashing may be needed for unusual roof angles or transitions, while gaps around penetrations should be carefully sealed to prevent water intrusion.
Installing Ridge Caps, Flashing, and Accessories Correctly
Ridge caps, flashing, and accessories are vital for waterproofing a metal roof. Ridge caps should allow for thermal expansion while being securely fastened. Flashing around skylights, vented ridges, chimneys, and curbs should be shaped accurately and sealed to prevent leaks. Valley flashing at eaves, rakes, and gables ensures proper water flow and prevents pooling. Sealants provide additional protection alongside mechanical fasteners, but correct installation of all trim and accessory components is essential for both function and aesthetics. Proper installation of these elements helps avoid water damage and enhances the overall appearance of the roof.
Common Installation Mistakes and How to Avoid Them
Metal roofing mistakes can compromise durability and performance. Common errors include improperly installed flashing, drilling in valleys, leaving exposed edges, misaligned panels, awkward angles, dead valleys, and incorrect fastener placement. Overlooking thermal movement, improper panel overlap, or mismatched panel profiles for roof slope can lead to costly repairs. Avoiding these mistakes requires careful planning, following manufacturer instructions, and inspecting work regularly during installation. Consulting third-party inspection services can provide an additional layer of assurance that installation meets industry standards.
DIY vs. Professional Metal Roofing Installation: What You Need to Know
Deciding whether to install a metal roof yourself or hire professionals depends on experience, time, and budget. Professional installers bring specialized tools, knowledge of panel systems, and experience with edge trim, flashing, and fastener placement. DIY installation can reduce costs but requires proper research, strict adherence to safety protocols, and correct handling of materials. Manufacturer warranties and installation requirements must be followed carefully, as improper installation can void coverage and shorten roof lifespan. Understanding both approaches ensures the roof will perform optimally for decades.
Maintaining Your Metal Roof and Preventing Leaks
Routine maintenance is crucial for maximizing the life of a metal roof. Regular inspections should focus on gutters, fasteners, sealants, overlaps, flashing joints, ridge caps, and valleys. Seasonal checks after severe weather help identify misalignments, panel warping, or leaks before they escalate. Proper maintenance also includes ensuring panels are stored correctly before installation, resealing penetration points, and confirming proper water drainage. Well-maintained metal roofs provide long-term durability, improve energy efficiency, and protect both residential and commercial buildings from weather-related damage.