
How Do You Install Steel Roofing?
Steel roofing is one of the strongest and most reliable choices for homes and buildings. It gives you strength, protection from weather, rust resistance, and saves energy. You can use corrugated panels, standing seam panels, or Colorbond steel, and a well-installed roof will last for many years with little maintenance. In this guide, we will show you how to install steel roofing safely and correctly. You will learn about all the tools, materials, preparation, step-by-step installation, final inspection, and mistakes to avoid. If you follow this guide, your roof will be water-tight, strong, and look great, giving you long-lasting value.
Tools and Materials Needed for Steel Roof Installation
Before you start, you need to have all the tools and materials ready. You will need steel roofing panels, synthetic or felt underlayment, furring strips, flashing, ridge caps, butyl tape or sealant, and roofing screws with rubber washers. You also need tools like a drill or screw gun, metal snips, chalk line, measuring tape, ladder, safety harness, gloves, non-slip boots, and protective eyewear. Having everything ready makes your work faster and safer. Using good materials that follow building codes is important for a strong, safe, and energy-efficient roof.
Table of Contents
- What Is a Roofing Square and Why It Matters
- Roofing Materials Sold by the Square
- Understanding Shingle Bundles
- How to Visualize Your Roof Size Before Replacement
- How to Calculate the Number of Roofing Squares
- Why Home Interior Square Footage Doesn’t Equal Roof Size
- Factors That Change Your Total Roof Area
- Key Cost Factors in Roof Replacement
Preparing Your Roof for Steel Panels
Good preparation is the first step to a safe steel roof. Check the roof deck for any rot, warping, or loose boards, and fix them. Make sure the roof slope or pitch is correct, usually at least 3:12, so water can drain properly. If your roof needs ventilation, install furring strips or battens to let air flow under the panels and stop moisture. Remove all old nails, debris, or old roof material to get a clean and level surface. Always put safety first by wearing a safety harness, gloves, hard hat, boots, and protective eyewear, and work with a partner. Measure the roof carefully to reduce waste and avoid mistakes.
Installing Underlayment and Drip Edge
The underlayment is a layer that stops water from going into the roof. Use synthetic or felt underlayment and roll it horizontally, overlapping each row by at least 4 inches. Nail it down with cap nails or staples. Next, install a drip edge along the edges of the roof to guide water into gutters and protect the roof edge. Installing the underlayment and drip edge correctly keeps your roof water-tight and strong. It also helps the steel panels sit flat and reduces damage from wind or heavy rain.
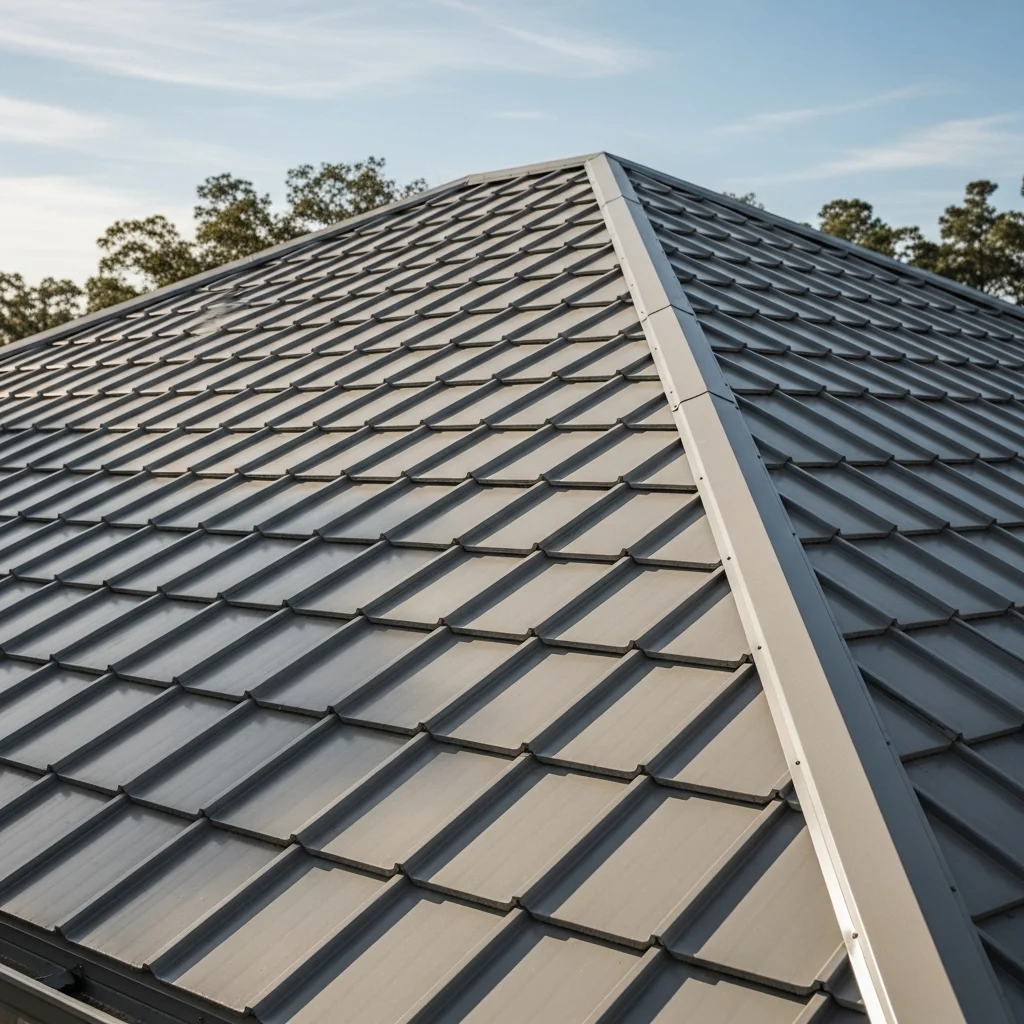
Aligning and Securing Steel Roofing Panels
Place the first steel panel along a chalk line, making sure the overhang, leveling, and flush alignment are correct. Fasten it with roofing screws with rubber washers, spaced evenly along supports. Do not over-tighten screws, because this can damage the washer and cause leaks. Work from the bottom of the roof to the top to keep panels in line. Make sure panel overlaps and seams are correct to stop water from getting in. Proper alignment and fasteners help your roof stay strong and last longer.
Installing Flashing, Ridge Caps, and Sealing Panels
Next, install flashing around areas like valleys, skylights, chimneys, and sidewalls to keep water out. Then, add ridge caps, using screws every 12-16 inches into the roof frame. Apply butyl tape or sealant on overlaps, seams, and flashing. Use sidewall and wide valley flashing where needed and make sure staggered panel overlaps are correct. Installing flashing and sealant properly protects your roof from leaks, wind damage, and helps keep it energy-efficient and weather-resistant.
Final Inspection, Cleanup, and Compliance with Building Codes
After finishing the roof, do a final check. Look at all fasteners, panel alignment, overlaps, flashing, and ridge caps. Remove any metal shavings or debris and clean gutters. Make sure the installation meets local building codes for safety and performance. A careful final inspection ensures your roof will be strong, durable, and water-tight, giving you long-term protection and peace of mind.
Common Mistakes and DIY Installation Tips
Small mistakes can cause big problems. Avoid misaligned screw rows, overdriven or underdriven screws, skipping underlayment, and poor panel overlaps. DIYers should measure carefully, keep panels aligned, and handle them safely. Always follow safety rules when working at height and call a professional if the job is difficult. Paying attention to these details will help you have a durable steel roof that protects your home for decades.